CH Disassembly/Assembly Line - en Masse

For the discussion of materials, techniques, etc.. necessary to restore or otherwise repair signals.

Moderator: signalfan

Re: CH Disassembly/Assembly Line - en Masse

Postby khardy on Sun Sep 01, 2013 9:36 am

Hiya Folks,

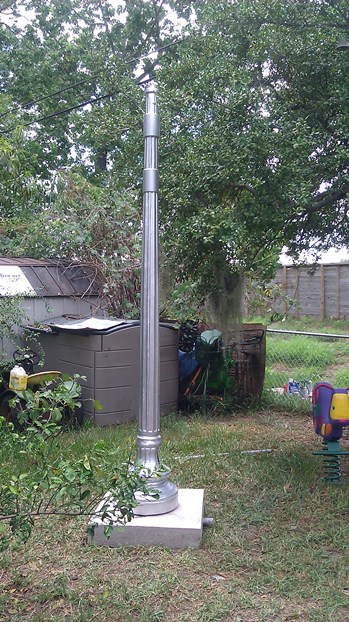
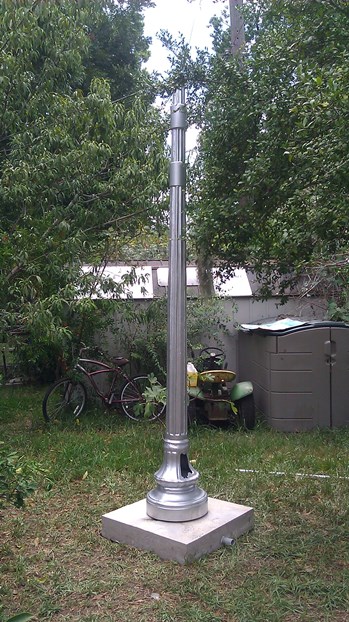
As mentioned earlier, we are making a cement pad or base for the CH "D" horizontal lights on a post.

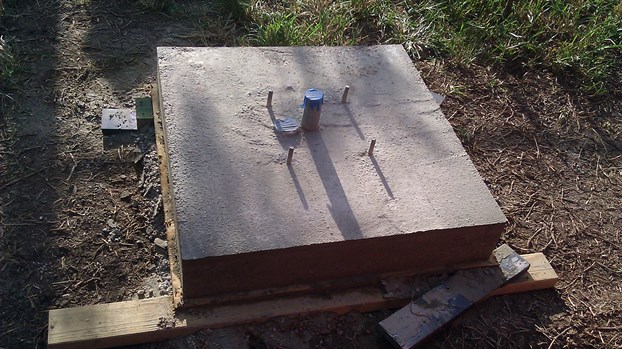
Here is the form we put together this morning.
Image

Image

Image

Image

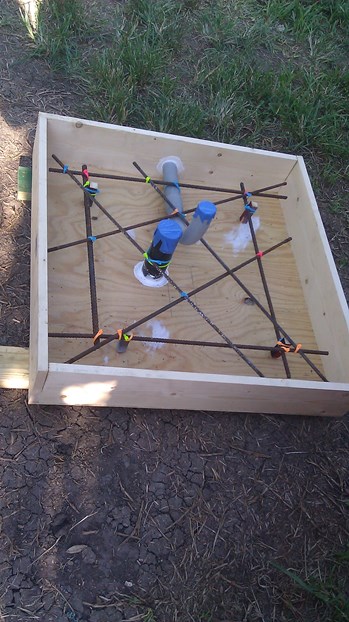
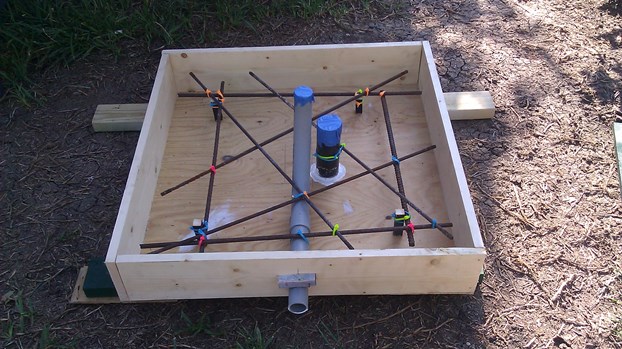
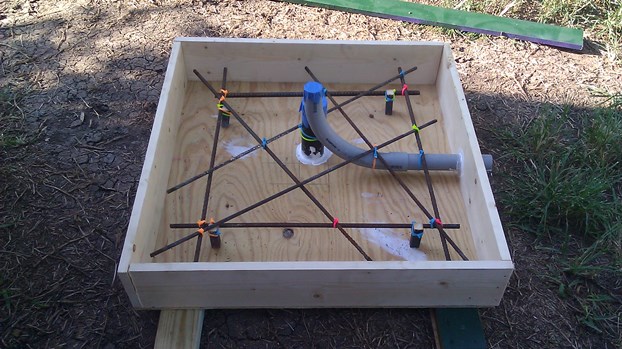
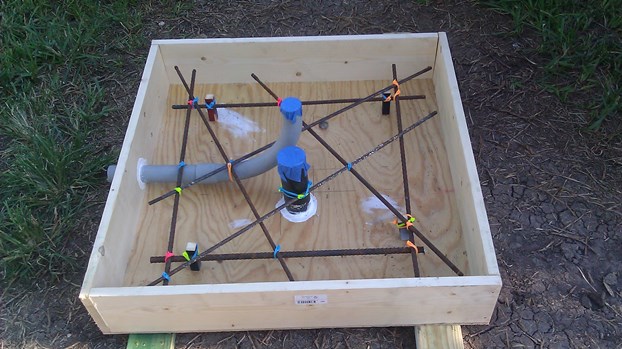
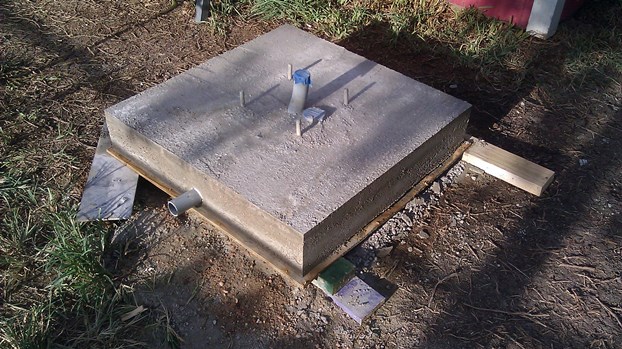
The inside of the box form is 30 inches square and 5-1/2 inches deep. Used some left over rebar from our driveway expansion and four rusted rods that were replaced in several CH lights. This should add some reinforcement to the slab. Installed a 1-1/4 pvc 90 for the wire run. The other pipe is 2 inch ID which will go through the slab for anchoring into the ground.

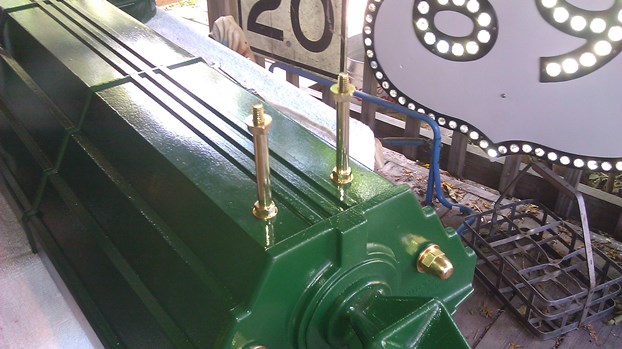
Will mix and pour cement today adding the four post anchor bolts.

Cheers!


User avatar
khardy
Crusty Old Salt
Crusty Old Salt
 
Posts: 489
Joined: Tue Dec 18, 2012 3:27 pm
Location: Houston, Texas

Re: CH Disassembly/Assembly Line - en Masse

Postby khardy on Mon Sep 02, 2013 6:48 pm

We now have a 300 plus pound slab for the CH back to back horizontal set up and post.
Image

Image

Will take a week or so for this to cure before we move it to where we think we would like to store this light setup in the back yard. After we move it, will spread a thin cement finish and paint battleship gray.

Cheers!

User avatar
khardy
Crusty Old Salt
Crusty Old Salt
 
Posts: 489
Joined: Tue Dec 18, 2012 3:27 pm
Location: Houston, Texas

Re: CH Disassembly/Assembly Line - en Masse

Postby khardy on Sun Sep 08, 2013 1:40 pm

Hi Folks,

We are trying to knock out a couple of things around the yard today. Managed to mount the post for the CH Horizontal back to backs.
Image

Image

We still have more preparations to make before attaching the light fixtures.

Cheers!


User avatar
khardy
Crusty Old Salt
Crusty Old Salt
 
Posts: 489
Joined: Tue Dec 18, 2012 3:27 pm
Location: Houston, Texas

Re: CH Disassembly/Assembly Line - en Masse

Postby EdT. on Sun Sep 08, 2013 1:43 pm

How are you moving that monster around?

Great project BTW. :thumbsup:
Ed
----------------------------
"There are days like that. Everyone you meet is a dope. You begin to look at yourself in the glass and wonder." - Philip Marlowe
User avatar
EdT.
Site Admin
Site Admin
 
Posts: 5835
Joined: Tue Jun 19, 2007 10:01 am
Location: Bergen County, NJ

Re: CH Disassembly/Assembly Line - en Masse

Postby khardy on Sun Sep 08, 2013 2:13 pm

Hi Ed,

Sondra and I moved the cement slab about 20 feet using two hand trucks and a couple of 4x4 blocks. Once we had it in position, we had to put it on one end and dig the grass out so as to level the slab. Used a 4 foot pipe stuck into the conduit on the side to raise it.

The post is heavy, but we both were able to carry it around the fence and lay it next to the slab. Used some small pieces of plywood on the slab to insulate the cement from the post when we raised it up onto the anchor studs. Once the post was up and in place, installed some 1/4 x 2 inch flat bar with washers and nuts onto the studs. Seems pretty sturdy.

Cheers!

User avatar
khardy
Crusty Old Salt
Crusty Old Salt
 
Posts: 489
Joined: Tue Dec 18, 2012 3:27 pm
Location: Houston, Texas

Re: CH Disassembly/Assembly Line - en Masse

Postby khardy on Wed Sep 11, 2013 8:04 pm


Hiya Folks,

We have been doing a little work on the CH "D" horizontal setup today. These lights were set aside in late June before we took our summer trips.
Image

Image

Image

After installing some of the hardware on the cabinets, put together the conduit that will hold the slave light to the light with clamps.
Image

Image

Image

Image

Will make adjustments to the conduit tomorrow before painting and attaching the slave cabinet.

Cheers!


User avatar
khardy
Crusty Old Salt
Crusty Old Salt
 
Posts: 489
Joined: Tue Dec 18, 2012 3:27 pm
Location: Houston, Texas

Re: CH Disassembly/Assembly Line - en Masse

Postby khardy on Thu Sep 12, 2013 10:57 am


Hi Folks,

We are doing a little pre-assembly on the CH flag mount lights this morning.
Image

Image

Image

Image

Have a few little adjustments before tightening the set screws in the conduit. Will remove the slave light cabinet and hope to finish priming the conduit this morning and paint green this afternoon. Will work on the wiring harness and other parts today.

Believe we will "see the light on the top of the post soon" so to speak after redoing five CH decos recently. :grin:

Cheers!


User avatar
khardy
Crusty Old Salt
Crusty Old Salt
 
Posts: 489
Joined: Tue Dec 18, 2012 3:27 pm
Location: Houston, Texas

Re: CH Disassembly/Assembly Line - en Masse

Postby dkendr on Thu Sep 12, 2013 4:02 pm

khardy wrote:Believe we will "see the light on the top of the post soon" so to speak after redoing five CH decos recently.


I may not even get to do one CH deco renovation in my lifetime. Glad the project has gone so well for you and I'm enjoying the results.

One question, and I apologize if you've covered it already; wouldn't it have been easier to paint the fixtures and pipes before assembling them?

D
User avatar
dkendr
Signal Crazy
Signal Crazy
 
Posts: 195
Joined: Mon Sep 05, 2011 5:36 pm
Location: Deliverance County, Georgia

Re: CH Disassembly/Assembly Line - en Masse

Postby khardy on Thu Sep 12, 2013 4:21 pm

dkendr wrote: wouldn't it have been easier to paint the fixtures and pipes before assembling them?

D


Hi Dee,

Primed some of the conduit parts beforehand but figured any paint would get scarred during assembly with a pipe wrench. The conduit is probably tightened together more so than those in the field. Figure in the long run would look better cleaned up and painted in place. Besides, will probably have to do some of those "opps" touch-ups before completion.

Cheers!
User avatar
khardy
Crusty Old Salt
Crusty Old Salt
 
Posts: 489
Joined: Tue Dec 18, 2012 3:27 pm
Location: Houston, Texas

Re: CH Disassembly/Assembly Line - en Masse

Postby khardy on Thu Sep 12, 2013 7:22 pm

Hi Folks,
Continuing with the monster setup....

These are the studs that are used to hold the outer end of the slave light to the master.
Image

New paint on the conduit.
Image

Image

Image

Will add a couple of more coats tomorrow and hopefully get some more of the wiring harness finished.

Cheers!

User avatar
khardy
Crusty Old Salt
Crusty Old Salt
 
Posts: 489
Joined: Tue Dec 18, 2012 3:27 pm
Location: Houston, Texas

PreviousNext

Return to Signal Restoration

Who is online

Users browsing this forum: SignalFreak and 0 guests

cron